Why is my blog called “Mostly Dough Punching”? I’ve been taking pictures of my cooking and gardening for a while now and posting them on social media, and have long wanted to start a blog to chronicle my efforts.
Whilst looking for a name for the blog I came upon the phrase “dough puncher”, an early term for a person who cooks baked goods. I’ve called it “Mostly Dough Punching” because I’m going to include other cooking and a bit of gardening as well.
What sort of cooking will be included? Well, everything really. I like to try my hand at all kinds of cooking so I’ll have meat, fish, vegetables, fruit and grain. I’ll be baking, stewing, frying, boiling and grilling. I will be dehydrating and brewing, fermenting and pickling.
My vegetable gardening is nearly all done in containers so I hope my efforts might inspire people who think they don’t have space to grow their own vegetables. I’ll also be throwing in the odd tip here and there.
Well that’s it for the introduction. I can’t wait to get started. I hope you’ll find something useful as the blog progresses.
On Monday I decided it was time I went out for a foraging walk. I hadn’t been on one for quite a while due to various reasons. It was a nice day, weatherwise so that made it even better.
I dusted off my walking boots and fleece and put my waterproof jacket and a few bags in my rucksack and off I went.
I went out with the intention of getting some fungi and anything else was going to be a bonus. As it turned out I found no fungi (none that were edible, that is) but did get a good haul of crabapples and some rosehips and hawthorns.
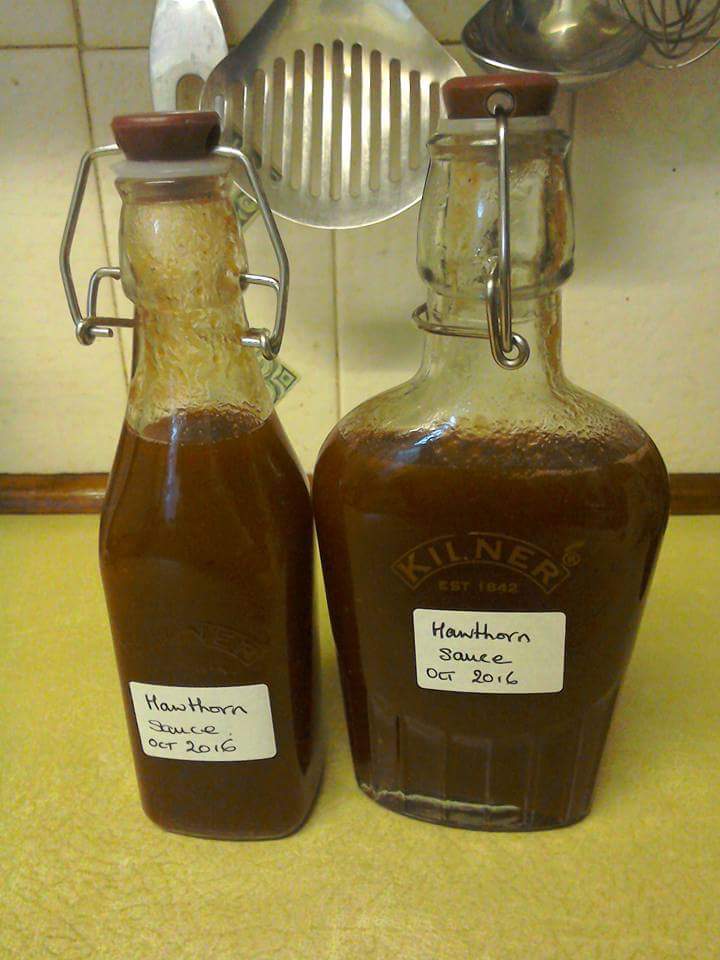
I have already made a sauce with the hawthorn berries. A bit like Chinese hoisin sauce, it’s well worth the effort it took to make it. Rich and fruity, with just a hint of star anise. I’m looking forward to using it in my next Chinese recipe.
I used this recipe and added 3 pieces of star anise to the mixture during the second boiling and then took it out prior to bottling.
The crabapples are in the process of being strained, after being cooked. I am going to use the juice for jelly and the pulp will be used to make crabapple cheese. The rosehips have gone in the freezer for the time being.
Midland Cresent in the old Meadows area of Nottingham was demolished in the mid 1970s
This was painted for my grandmother and shows Midland Crescent, the street where she lived in the old Meadows area of Nottingham. She lived at number 53, which is at the far left of the picture. This was also where I was born, so the picture is also a part of my family history.
A Water Bearer In China Had Two Large Pots, Each Hung On Each End Of A Pole, Which He Carried Across His Neck. One Of The Pots Had A Crack In It. While The Other Pot Was Perfect And Always Delivered A Full Portion Of Water At The End Of The Long Walk From The Stream To The Master’s House, The Damaged Pot Arrived Only Half Full.
For A Full Two Years This Went On Daily, With The Bearer Delivering Only One And A Half Pots Full Of Water In His Master’s House. Of Course, The Perfect Pot Was Proud Of Its Accomplishments, Perfect To The End For Which It Was Made.
But The Poor Cracked Pot Was Ashamed Of Its Own Imperfection, And Miserable That It Was Able To Accomplish Only Half Of What It Had Been Made To Do.
After Two Years Of What It Perceived To Be A Bitter Failure, It Spoke To The Water Bearer One Day By The Stream. “I Am Ashamed Of Myself, And I Want To Apologize To You.”
“Why?” Asked The Bearer. “What Are You Ashamed Of?”
“I Have Been Able, For These Past Two Years, To Deliver Only Half My Load Because This Crack In My Side Causes Water To Leak Out All The Way Back To
Your Master’s House. Because Of My Flaws, You Have To Do All Of This Work, And You Don’t Get Full Value From Your Efforts,” The Pot Said.
The Water Bearer Felt Sorry For The Old Cracked Pot, And In His Compassion He Said, “As We Return To The Master’s House, I Want You To Notice The Beautiful Flowers Along The Path.”
Indeed, As They Went Up The Hill, The Old Cracked Pot Took Notice Of The Sun Warming The Beautiful Wild Flowers On The Side Of The Path, And This Cheered It Some.
But At The End Of The Trail, It Still Felt Bad Because It Had Leaked Out Half Its Load, And So It Apologized To The Bearer For Its Failure.
The Bearer Said To The Pot, “Did You Notice That There Were Flowers Only On Your Side Of Your Path, But Not On The Other Pot’s Side? That’s Because I Have Always Known About Your Flaw, And I Turned It Into An Advantage. I Planted Flower Seeds On Your Side Of The Path, And Every Day While We Walk Back From The Stream, You’ve Watered Them.For Two Years I Have Been Able To Pick These Beautiful Flowers To Decorate My Master’s Table.Without You Being Just The Way You Are, He Would Not Have This Beauty To Grace His House.”
The Moral Of This Story:
Each Of Us Has Our Own Unique Flaws. We’re All Imperfect Pots. But, It’s The Cracks And Flaws We Each Have, That Make Our Lives Together So Very Interesting And Rewarding. You’ve Just Got To Take Each Person For What They Are, And Look For The Good In Them.
Love With Your Heart, Not With Your Eyes ‘Cos In The End We Are All Cracked Pots!!!
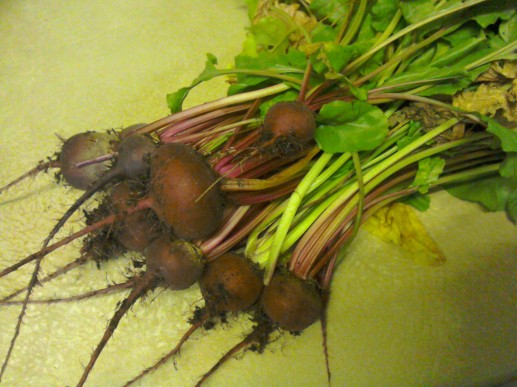
This year I grew a few heritage beetroot in a large pot in the garden. I’ve had a few roast in the oven and a few quick pickled in apple scrap vinegar. As they looked as though they weren’t going to grow any more, I’ve picked what was left this morning and I am fermenting them.
Heritage Beetroot from the garden
This is the first time I’ve fermented vegetables so I’m not quite sure what to expect.
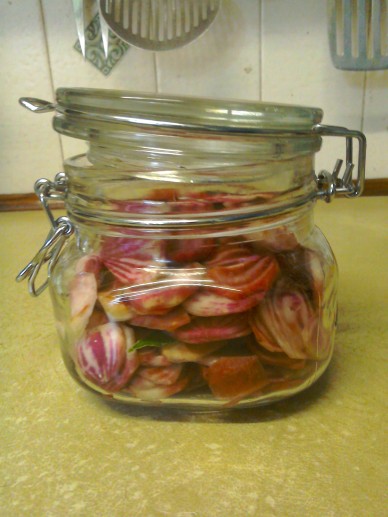
I did consider fermenting them in plain water, but decided to do it in a brine instead as it is easier. peeled and sliced the beetroots, which are red and white inside, and put them in a sterilised Kilner jar, along with 3 bay leaves.
Sliced beetroot and 3 bay leaves in the Kilner jar
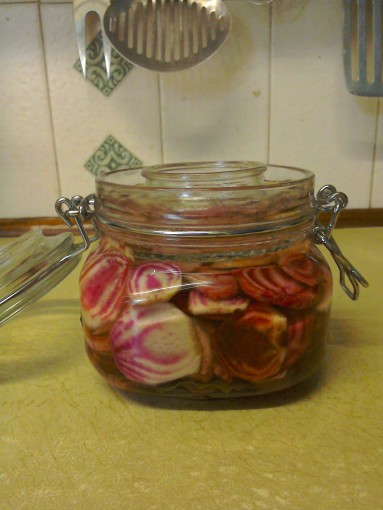
The brine was a solution of 4 cups of filtered water and 2 tbs of rock salt. This was added to the jar until it covered the beetroot. It is importand to ensure that all the vegetables are submerged to deter mould growth. I use a sterilised glass lid smaller that the Kilner jar and use that to weigh down the vegetables.
Beetroot with the brine added and the weight holding them under the surface.
I added bay leaves to my beetroot but you can any herbs or spices that take your fancy. Why not try garlic, ginger, coriander or chillies to name but a few.
Once in a while you are going to find that your Ginger Bug is no longer fermenting and whatever you do it will no revive. In days gone by I would have just scrapped it but now I think differently. If you think that there is a lot of flavour still in that Ginger Bug even though it’s no longer fit for it’s original purpose.
Nowadays I separate the solids from the liquid. Put the solids in the dehydrator and when dried, grind it down to a powder to use for flavouring. the liquid is boiled down with some extra sugar to make a delicious ginger syrup.
Jpeg
Jpeg
Put the strained ginger solids on a tray or parchment paper in a dehydrator until it is completely dry and brittle. Leave to cool a little, but not too long or it will start to get damp and sticky. Remember, it’s been soaking in a sugar solution for a long time.
When cool, grind down in a grinder or a pestle and mortar. Put in a dry jar with a tight lid straight away.
Put the stained liquid in a clean saucepan and add 1/2 cup of sugar per pint. It might sound a lot put you’re not going to use a lot at a time. Stir until dissolved and then bring to the boil. Simmer until the liquid becomes syrupy. The longer you simmer it the thicker it will get. Don’t forget, it will also thicken as it cools so allow for that.
Leave to cool slight and put in a clean, sterilised jar and seal immediately.
One of my favourite drinks has got to be ginger beer but I find that nearly all commercial brands are far too sweet for me. Its easy enough to make your own but it needs a little preparation.
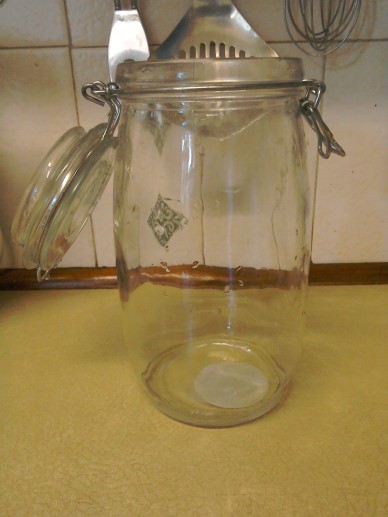
You will need a quart size Kilner jar or something similar, a piece of clean cloth to use as a lid and an elastic band to fasten it.
You will also need
2 cups of filtered water
2 tablespoons grated or finely chopped fresh ginger
2 tablespoons sugar. I find that ordinary white sugar works best.
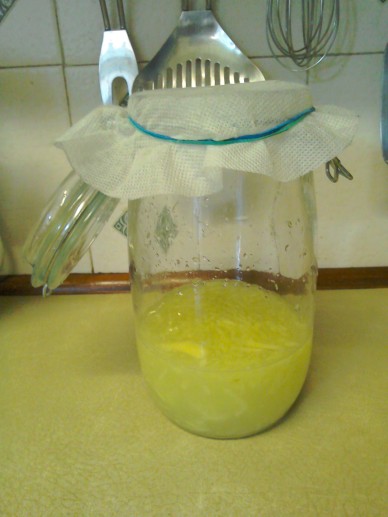
Put all the ingredients in to the jar and stir until the sugar is dissolved.
Cover and leave in a warm place. Stir again at least twice a day and once a day add 1 tablespoon of grated ginger and 1 tablespoon of sugar and stir again.
After a few days the wild yeasts in the atmosphere and on the ginger will cause the mixture to start fermenting. You will see bubbles and the grated ginger will be pushed to the surface. The stirring regularly is important for two reasons. Firstly it deters mould from growing on the surface and secondly it aerates the mixture and encourages fermentation.
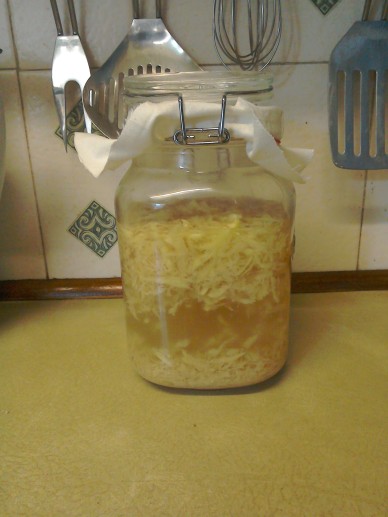
A well established Ginger Bug
When it reaches this point it is ready to use for making Ginger Beer
If your Ginger Bug is slow in starting to ferment, here’s a little tip I picked up off the Internet. It might seem strange but it’s worked for me every time I’ve tried it. When the time comes to stir your bug, take off the cover and walk around the room, jar in hand and move it in a scooping motion as though trying to catch a butterfly. You are, in fact, catching the wild yeasts that are present all around us.
This has got to be one of my favourite recipes at the moment and toasted muffins for breakfast take some beating. This recipe is quite easy but does take two days overall.
I vary the basic recipe by halving the dough and cooking one half plain and to the other half I mix in two teaspoons of onion powder, a teaspoon of mustard powder and 4 ounces of finely grated strong cheese. This is not my recipe, so apologies beforehand in case I’ve infringed anyone’s copyright.
1 cup activated starter / sponge
5 ¼ cups flour (white and whole wheat mix)
2 cups milk (you can do all water / partial water if need be)
stir together flour and sd milk mixture until well incorporated, let sit for 1/2 hour covered and then fold / knead it in the bowl for a few minutes. cover and leave overnight for 12-14 hrs.
after the long rise fold / knead in…
2 tsp baking soda
1 1/2 tsp salt
(keeping it all in the bowl, until mixed well 3-4 minutes)
cover with towel and let sit for 20 minutes.
*It’s at this stage I add the cheese, mustard and onion powder.
roll out to 1/2 – 1 inch thickness into lightly floured surface. use biscuit cutter or cup to cut out rounds. place on lightly floured surface cover with towel and let rest for another 20 minutes.
heat frying pan (I recently use a well seasoned cast iron) to medium low, you may have to oil it a bit depending on the pan. I sometimes do this for the first ones, but then don’t need anymore. when pan is ready brush extra flour off muffins and start cooking, about 3 minutes on each side, until both sides are golden or even browned.
serve fresh or toast the following days.
I have found that they also freeze very well.